
TUNER TNT S825 - DVB-T tuner EMTEC - Free user manual and instructions
Find the device manual for free TUNER TNT S825 EMTEC in PDF.



| Product type | USB DVB-T Tuner |
| Brand | EMTEC |
| Model | DVB-T Tuner S825 |
| Dimensions (approx.) | 7.5 x 2.5 x 1 cm |
| Weight (approx.) | 20 g |
| Power supply | USB port (5 V) |
| Connectivity | USB 2.0 |
| Reception | DVB-T and analog |
| Main functions | Digital TV reception, recording, teletext, EPG, timeshift |
| Operating system | Windows 2000 SP4 / XP |
| Minimum configuration | Pentium IV 1.4 GHz, 256 MB RAM, DirectX 9c, 100 MB disk |
| Antenna included | Yes, with magnetic base |
| Software provided | Savvy TV |
| Package contents | DVB-T key, CD, quick start guide, antenna |
| Maintenance and cleaning | Clean with a soft, dry cloth |
| Safety | Do not expose to water; avoid magnetic fields nearby |
| Spare parts and repairability | Adapter for wall antenna (sold separately); not user repairable |
| General information | Compatible with USB 1.1; no external power supply needed |
Frequently Asked Questions - TUNER TNT S825 EMTEC
User questions about TUNER TNT S825 EMTEC
0 question about this device. Answer the ones you know or ask your own.
Ask a new question about this device
Download the instructions for your DVB-T tuner in PDF format for free! Find your manual TUNER TNT S825 - EMTEC and take your electronic device back in hand. On this page are published all the documents necessary for the use of your device. TUNER TNT S825 by EMTEC.
USER MANUAL TUNER TNT S825 EMTEC
(and other countries)
www.intuix.net

Service Hotline 0900-510 255 00*
Link your USB DVB-T tuner to your wall antenna !!
Compatible TV Tuner USB
There are 3 ways to record:
Live Recording
To record what is currently being shown on the screen, press the record button.
TimeShift Recording
NOTE: TimeShift recording is very useful when you are watching a program and may have to leave just for a moment, for example if the phone rings.
To activate TimeShift recording, simply press the TimeShift button. This will start timeshifting the program currently being shown. The computer may now be left unattended. When you return to the computer, you can use the forward wind or rewind buttons to search within the recording. Use the play button to play or the pause button to pause. None of these buttons will stop the recording. To stop time shift recording, press the stop button.
Scheduled Recording
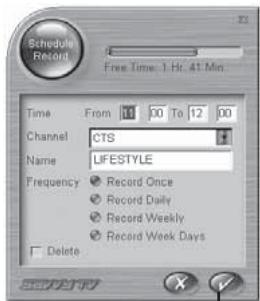
Press on the EPG icon, which will open the EPG window. Double-click on the program you wish to record. This will open the Schedule Record window, as follows:

Connecting the DVB-T Dongle EN-15
Initial Setup EN-15
Description of Toolbars EN-16
Watching Digital TV EN-17
Recording EN-17
Viewing Modes EN-19
Teletext EN-20
EPG (Electronic Program Guide) EN-20
Troubleshooting Guide EN-21
ABOUT THE DVB-T DONGLE
The DVB-T dongle is a digital video broadcast receiver that plugs straight into the USB port of your computer and requires no additional power source, making it extremely portable. It can scan for and save all available digital TV stations and play any of these on your computer screen.
Minimum System Requirements
- USB port
- DirectX 9c
- Windows 2000/XP
- Pentium IV 1,4GHz ou équivalent
- 256MB RAM
- DirectX 9c compatible sound card
- DirectX 9c compatible video card
- 32MB HDD space (installation only)
Package Contents
- DVB-T dongle
- Software CD
- Quickstart guide
- Antenna
* Please note that the antenna has a magnetic base and should not be placed near any items that can be affected by magnetic fields, for example, computer or TV screens, floppy disks, or credit cards.
Note that Microsoft, Windows, Windows 2000 and Windows XP are registered trademarks of Microsoft Corp.
SOFTWARE INSTALLATION
Please install all necessary software BEFORE connecting your DVB-T dongle.
- Insert the provided CD-ROM into the CD drive of your computer.
- The installation screen will appear. However, if it does not, click on Start>Run and type D:\setup.exe,
where D refers to the letter assigned to your CD drive.
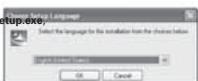
- You will be asked to choose the setup language, as follows :
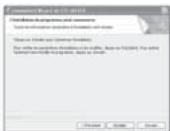
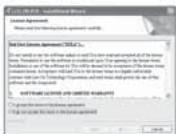
Choose a language and then click OK. You will now be asked to accept the End User License Agreement. Be sure to check the I accept the terms in the license agreement box, then click on Next.
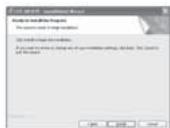
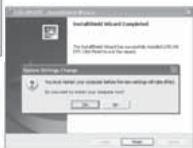
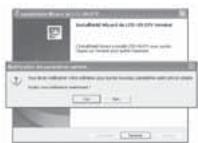
After a few seconds, the following screen will appear. Click on Install to continue the installation.
Once the software has finished being installed, you will be asked to restart the computer. Press Yes.
CONNECTING THE DVB-T DONGLE
Remove the cap from the DVB-T dongle, locate a free USB port on your computer and plug in the dongle. Once the computer recognises the new hardware, the New Hardware wizard will begin.

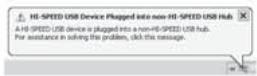
As the DVB-T is a Hi-Speed device, you may receive the following message if it is plugged into an older USB 1.1 port. The DVB-T will still work with USB 1.1. Simply click on the X in the top right-hand corner of this message.
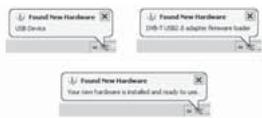
You will see several messages during the installation of the DVB-T dongle.
Please be patient, as this process make take a few minutes.
INITIAL SETUP

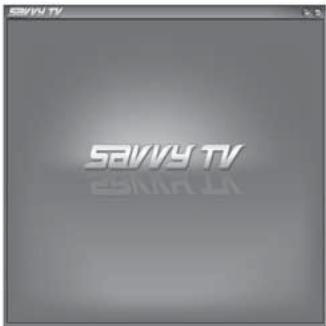
Double-click on the Savvy TV icon, which appears on your desktop. The TV display panel and control panel will appear (See next page). Note that the software may take a few seconds to open.

If the Settings screen does not automatically appear, click the Settings icon in the control panel to access the Settings screen.

The Settings screen has 5 tabs (to the left). First click on the Source tab and make sure that your hybrid tuner is chosen as the primary source. Now click on the Channels tab, choose your region from the drop-down list, and click the magnifying glass to scan for available channels. Once the scan is complete, click the tick icon at the bottom-right of the Settings screen.
DESCRIPTION OF TOOLBARS
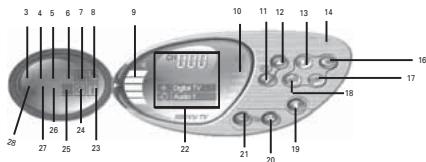
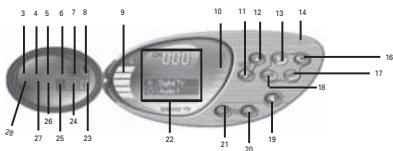
- Minimise display
- Full screen display
- Open video file
- Snapshot
- Subtitles
- Teletext
- EPG (Electronic Program Guide)
- Setup
- Volume
- Signal
- Channel down
- Channel up
- Record
-
Minimise
-
Close
- Recall
- Audio select
- TimeShift
- Mute/un-mute
- Volume up
- Volume down
- Channel information
- Program information
- Visual
- Channel preview
- Main/child
- Change screen mode
-
Change device
-
Use the channel up/down buttons, or the keyboard up/down cursor keys, to move through the channels one by one. Alternatively you can type a channel number directly.
- Use the volume up/down buttons, or the keyboard right/left cursor keys to increase/decrease the volume. Use the mute button to mute or un-mute the sound.
RECORDING
Recording
There are 3 ways to record:
Live Recording
To record what is currently being shown on the screen, press the record button.
TimeShift Recording
NOTE: TimeShift recording is very useful when you are watching a program and may have to leave just for a moment, for example if the phone rings.
To activate TimeShift recording, simply press the TimeShift button. This will start timeshifting the program currently being shown. The computer may now be left unattended. When you return to the computer, you can use the forward wind or rewind buttons to search within the recording. Use the play button to play or the pause button to pause. None of these buttons will stop the recording. To stop time shift recording, press the stop button.
Scheduled Recording
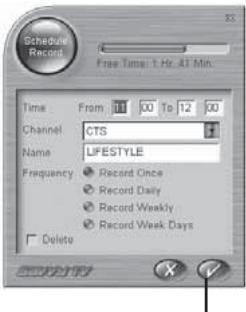
Press on the EPG icon, which will open the EPG window. Double-click on the program you wish to record. This will open the Schedule Record window, as follows:

(Clic here)
The information you require to record the proram will already be entered. However, the following information can be edited manually:
- Start and end times of the recording (24 hour format)
•Channel
•A name for the recording
•Frequency of recording
To accept the details of the scheduled recording, click the tick icon at the bottom-right of the Schedule Record screen.
Watching Recorded Programs
Press the open video file icon, which will open up a browser window, allowing you to search for recorded mpg/mpeg files. This method allows you to view both scheduled recordings and live recordings, as well as other mpeg files.
The Recording/Playback Control Panel
The recording/playback control panel differs slightly from the standard control panel, as follows:
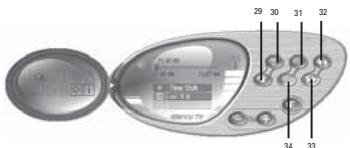
- Stop
- Play/pause
- Slow motion rewind
- Rewind
- Forward wind
- Slow motion forward wind

Display as Wallpaper
This option will set the TV screen as the computer wallpaper.
In effect, it will be set as full screen and moved to the back.
Any other windows or icons will be placed on top of the TV screen.
Normal viewing mode can be restored from the Windows taskbar (see note below).
Minimise Window
This option will minimise the screen.
It can be restored from the Windows taskbar (See note below).
Full Screen
This option will display the TV full screen, and remove the control panel.
Click anywhere on the screen to return to normal viewing mode.
A Note About Viewing Modes
Both the display screen and the control panel can be restored from the Windows taskbar as follows:
- Right-click on the Sawy DTV tab in the Windows taskbar.
- Select Restore Display Panel or Restore Control Panel.
Note that if you are currently in Wallpaper mode, you will need to choose the Window Mode option to return to normal viewing mode.

NOTE: A more detailed User Guide is included on the enclosed CD.

NOTE: Microsoft, Windows, Windows 2000, Windows XP and Window MCE are registered trademarks of Microsoft Corp.
TELETEXT
The Sawy Digital TV software can also access Teletext. To do so, click on the Teletext button
on the control panel.

The Teletext control panel and the Teletext display screen will appear as follows:
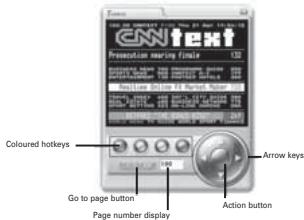

There are several ways to navigate whilst in Tele
The left/right arrow keys can be used to move through the teletext pages one at a time. If subpages are available, then the up/down cursor keys can be used to navigate through these. In the above picture, for example, the page is 100, and the subpage is 08.
The page number display field can also be typed into directly. After the page number is typed, click on the Go to Page button in order to go to that page.
The four coloured buttons (red, green, yellow and blue) can be used at hotkeys to go directly to the coloured links which appear at the bottom of the teletext display screen.
The action button enables you to choose any page number displayed within the screen.
Once the action button has been pressed, it will change colour. You can then use the up/down arrow keys to navigate within the screen.
Once the page you would like to go to is highlighted, press the action button again to go to that page.
EPG (Electronic program guide)
The Sawy Digital TV software is EPG compatible. This means that you can get instant access to the list of programmes available to you.
To access this feature, click on the EPG button on the control panel.

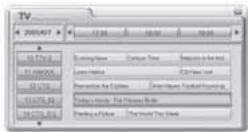
You will find a list of channels down the left-hand side.
These can be scrolled through, using the up and down arrows above and below the list.
Clicking on any of the channels will change which channel you are currently viewing (highlighted in green, with programmes highlighted in blue). In the top left-hand corner, you will see the date.
This can also be changed, using the accompanying arrows. To the top of the main section, you will see the time.
Again, this can be scrolled through, using the arrows.
Note that some channels may not offer the EPG function.
TROUBLESHOOTING GUIDE
| Problem | Possible Reason | Solution |
| No picture | Currently viewing radio station | No picture will appear on radio channels |
| No sound | Mute mode is activated | Click on the speaker icon beside the volume indicator to restore the sound |
| Volume level is set too low | Increase volume | |
| Cannot tune stations | Poor signal | Move the antenna for better reception |
| Wrong country is chosen in Setup | Choose the correct country in Setup | |
| Picture performance is poor | Not using latest version of Direct X | Download latest version of Direct X |
| Computer hardware does not meet minimum requirements | Upgrade hardware to meet minimum requirements | |
| Too many programs are being used at the same time | Close unnecessary programs | |
| Poor signal | Move the antenna for better reception | |
| Laptop computer is using battery power | Try plugging the laptop into its power supply | |
| Error message appears when starting software, saying “Please plug in the tuner”. | Tuner is not plugged in | Plug in tuner, or if necessary, disconnect and then reconnect. |
| The DVB-T tuner is heating while operating | Electronic parts of this tuner are reasonably heating | this doesn't affect your PC; heat stabilizes automatically after 15 minutes |
S825
Tuner TNT/DVB-T USB
benutzerhandbuch
INHALTSVERZEICHNIS
Über den DVB-T Tuner D-24
Softwareinstallation D-24
EPG (Electronic Program Guide) D-30
(Clic here)
EPG (Electronic program guide)
- LIVE RECORDING
- TIMESHIFT RECORDING
- SCHEDULED RECORDING
- ABOUT THE DVB-T DONGLE
- MINIMUM SYSTEM REQUIREMENTS
- PACKAGE CONTENTS
- SOFTWARE INSTALLATION
- CONNECTING THE DVB-T DONGLE
- INITIAL SETUP
- DESCRIPTION OF TOOLBARS
- RECORDING
- WATCHING RECORDED PROGRAMS
- THE RECORDING/PLAYBACK CONTROL PANEL
- DISPLAY AS WALLPAPER
- MINIMISE WINDOW
- FULL SCREEN
- A NOTE ABOUT VIEWING MODES
- TELETEXT
- EPG (ELECTRONIC PROGRAM GUIDE)
- S825
- TUNER TNT/DVB-T USB
- INHALTSVERZEICHNIS
Brand : EMTEC
Model : TUNER TNT S825
Category : DVB-T tuner